


Casement window installation is the process of fitting a side-hinged window unit into a prepared wall opening using precise measurement, secure anchoring, and proper sealing to deliver lasting energy efficiency and smooth operation. Understanding what is a casement window installation means knowing it is far more than swapping glass. Every step, from measuring the rough opening to applying flashing tape and expanding foam, directly affects how well the window performs for decades. Bruin Corp of Attleboro has completed over 11,000 projects across Massachusetts and Rhode Island, and the most common source of post-installation problems is skipped steps during prep and measurement.
What is a casement window installation, and how do you measure for one?
Accurate measurement is the single most critical step in the entire installation process. A window that is even slightly too wide or too tall will bind, leak air, or require costly frame modifications. Getting this right before ordering saves you time, money, and frustration.
Measure both the width and height at three separate points: top, middle, and bottom for width, and left, center, and right for height. Measure at three points and always record the smallest measurement. That smallest number gives you the correct window size with roughly a 1/4 inch tolerance built in for fitting.
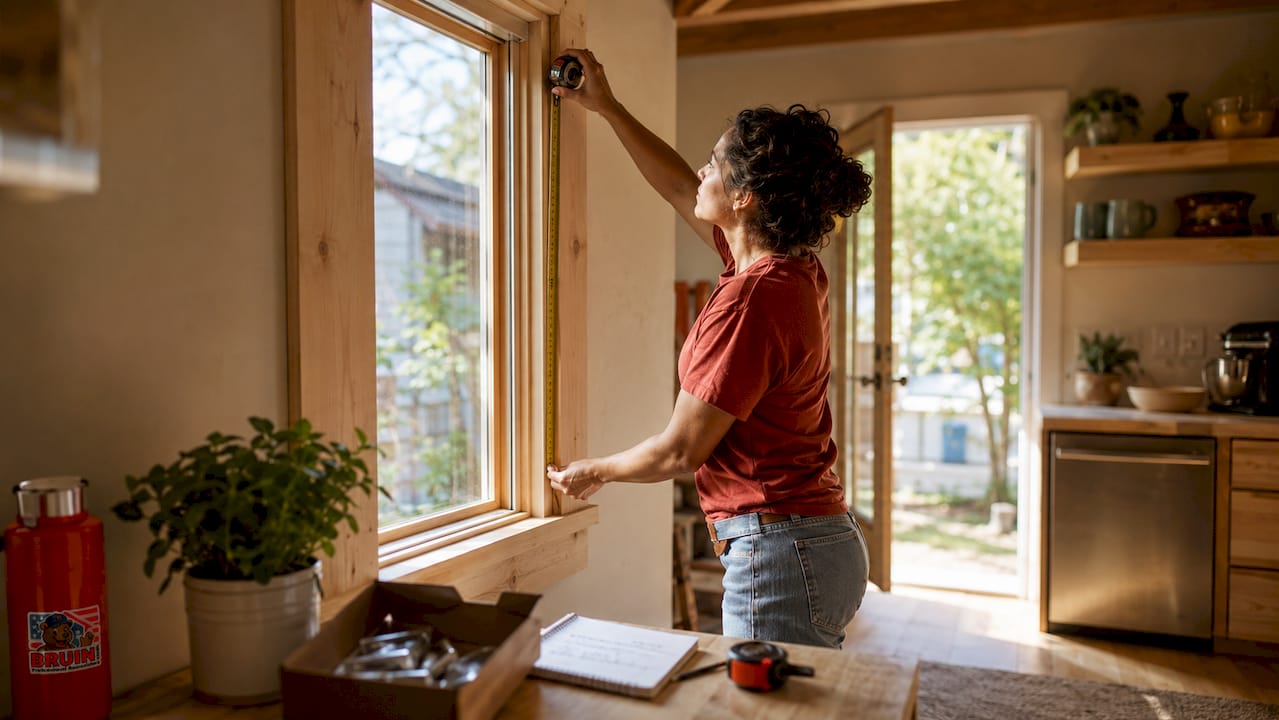
Checking the rough opening for squareness is just as important as measuring dimensions. Run a tape measure diagonally from corner to corner in both directions. If the two diagonal measurements match, the opening is square. If they differ, you need to correct the framing before the window arrives.
Professional installers often measure in millimeters rather than inches to avoid fraction rounding errors. Rounding to the nearest 1/8 inch can introduce small inaccuracies that compound into manufacturing problems for custom-fit units. That level of precision matters most when ordering wood or aluminum frames with custom dimensions.
- Measure width at the top, middle, and bottom of the opening
- Measure height at the left, center, and right of the opening
- Record the smallest measurement in each direction
- Check diagonal measurements to confirm the opening is square
- Use millimeter measurements for custom-ordered windows
Pro Tip: Take your measurements twice on different days. Wood framing can shift slightly with humidity changes, and a second measurement confirms you have a stable, accurate number before placing your order.
How to install a casement window: step-by-step process
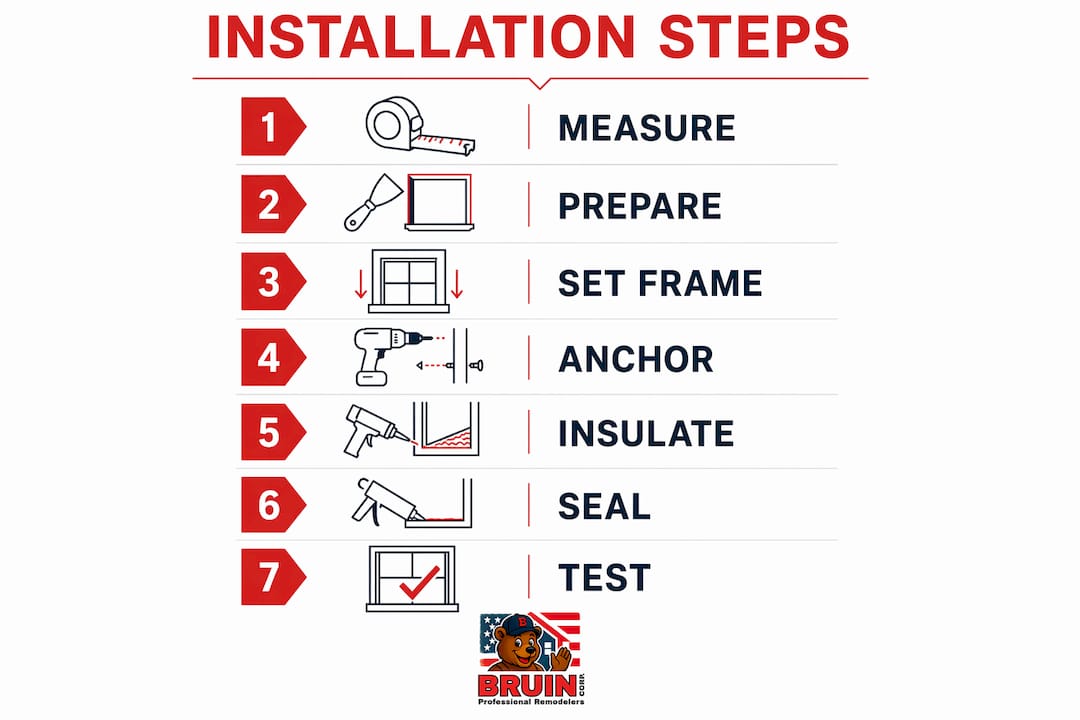
The installation process for casement windows follows a clear sequence. Skipping any step creates air leaks, water infiltration, or a window that binds and wears out prematurely. Work through each stage in order.
-
Prepare the opening. Remove the old window completely. Inspect the rough opening for rot, damaged framing, or deteriorated sill. Repair any rot before proceeding. A structurally sound opening is the foundation of a long-lasting installation.
-
Apply flashing tape. Run self-adhesive flashing tape along the sill and up both sides of the opening. This waterproof barrier is your primary defense against water infiltration behind the frame. Overlap the tape at corners so there are no gaps.
-
Set the window in the opening. Lift the window unit into place from the exterior side. Center it in the opening and rest it temporarily on the sill. Have a second person hold it steady while you begin shimming.
-
Level and plumb with shims. Insert cedar shims at the sill corners and along the sides to bring the window into level and plumb alignment. Check with a level on both the sill and the side jamb. A window that is even slightly out of plumb will swing open or closed on its own.
-
Anchor the window securely. Drive fasteners through the frame into the rough framing. Fasten at maximum 24-inch spacing and place cedar shims directly behind each anchor point. The shims prevent the aluminum or wood frame from bowing inward as you tighten the screws. Run diagonal strings across opposite corners to verify the frame stays square throughout anchoring.
-
Insulate the gaps. Fill the space between the window frame and the rough opening with low-expansion spray foam. Standard expanding foam can push the frame out of square. Use a foam product labeled “window and door” specifically, as it expands with less force.
-
Seal the exterior. Apply a continuous bead of exterior-grade caulk around the perimeter of the window on the outside. Smooth it into the joint so there are no voids.
-
Test operation and finish. Open and close the casement sash several times. It should swing freely and latch without force. Install interior trim to cover the gap between the window frame and the drywall.
Pro Tip: Before applying foam insulation, tape over the operating hardware and the sash seal. Foam that contacts the compression seal or crank mechanism is difficult to remove and can permanently damage the window’s operation.
What are the benefits of casement windows after installation?
Casement windows hinge on the side and open fully outward, which gives them two performance advantages no other common window style matches: full sash ventilation and an unobstructed view. When you open a double-hung window, you access at most half the opening. A casement opens the entire sash area to airflow.
Energy efficiency is the standout benefit for most homeowners. Compression seals created by locking hardware pull the sash tightly against the frame when the window is closed. That compression creates a tighter air seal than the sliding contact used in double-hung windows. The result is lower heating and cooling costs, which is especially valuable in Massachusetts and Rhode Island winters. You can read more about the full range of energy-efficient window benefits to understand how much this seal difference affects utility bills.
“Casement windows combine full ventilation, unobstructed sightlines, and compression-seal energy efficiency in a single unit. No other standard residential window style delivers all three at once.”
Ease of operation is another practical advantage. Casement windows can meet ADA accessibility standards when properly designed, requiring no more than 5 lb of force to operate. A single crank handle opens and closes the window with one hand, which matters for homeowners with limited mobility or for windows placed above countertops or deep in a wall.
- Full ventilation: The entire sash area opens, maximizing airflow
- Superior energy efficiency: Compression seals outperform sliding-contact seals
- Unobstructed views: No center rail divides the glass
- ADA-compliant operation: Single-handle crank requires minimal force
- Design flexibility: Available in modern and traditional profiles to match any home style
What types of casement windows are commonly installed?
Casement windows are available in wood, aluminum, and uPVC, and each material affects the installation technique, the tools required, and the long-term maintenance expectations. Choosing the right material for your climate and budget is as important as the installation itself.
| Window type | Key installation consideration | Best suited for |
|---|---|---|
| Single casement | One sash, one set of hinges; straightforward anchoring | Smaller openings, bathrooms, kitchens |
| Double casement | Two sashes meeting at center; requires precise alignment of both frames | Wider openings, living rooms |
| Wood frame | Heavier; requires rot-resistant treatment at sill before installation | Traditional homes, interior aesthetics |
| Aluminum frame | Lightweight; cedar shims critical to prevent frame bowing | Modern homes, coastal climates |
| uPVC frame | Requires 5–10 mm clearance for thermal expansion and contraction | Budget-conscious projects, low maintenance |
Replacement installations and new construction installations follow different prep steps. A replacement project involves removing an existing window and working within the existing rough opening. New construction allows you to frame the opening to the exact window size, which gives more flexibility but requires accurate coordination between the framing crew and the window order.
Hinge position also varies by manufacturer and frame material. Most residential casement windows hinge on the left or right side, but some commercial-grade units use top-hung hinges for awning-style operation. Confirm hinge placement before ordering, because reversing a hinge after installation is not a simple field adjustment on most modern frames.
How much does casement window installation cost?
Installation costs average $600–$1,400 per window, with the final number depending on window style, glass type, frame material, and labor rates in your area. That range covers both the window unit and professional installation. It does not include structural repairs to damaged framing, which add cost if rot or water damage is found during prep.
Several factors push costs toward the higher end of that range:
- Double or triple-pane glass: Adds insulating value but increases unit cost
- Custom sizes: Non-standard dimensions require factory orders and longer lead times
- Frame material: Wood frames cost more than uPVC; aluminum falls in between
- Damaged rough opening: Rot repair or reframing adds labor and material costs
- Second-story or difficult access: Increases labor time and may require scaffolding
Labor alone typically represents a significant portion of the total cost. A professional installer brings the tools, experience, and warranty coverage that a DIY project cannot replicate. For homeowners in Massachusetts and Rhode Island, local labor rates and permit requirements also factor into the final price. Getting a written quote that separates material costs from labor costs gives you the clearest picture of where your money goes. You can also review replacement window sizing guidance to understand how window dimensions affect pricing before you request quotes.
Key Takeaways
Casement window installation requires accurate measurement, sequential anchoring with cedar shims, compression-seal design, and proper waterproofing to deliver lasting energy efficiency and smooth operation.
| Point | Details |
|---|---|
| Measure at three points | Record the smallest width and height measurement to get the correct fit with 1/4 inch tolerance. |
| Use cedar shims behind every anchor | Shims prevent frame bowing and keep the window square throughout the anchoring process. |
| Flashing tape is non-negotiable | Apply waterproof flashing tape at the sill and sides before setting the window to block water infiltration. |
| Compression seals drive energy savings | Casement locking hardware pulls the sash tight against the frame, creating a superior air seal versus sliding windows. |
| Cost ranges $600–$1,400 per window | Final price depends on glass type, frame material, labor, and any structural repairs needed in the rough opening. |
Casement window services from Bruin Corp of Attleboro
Bruin Corp of Attleboro has delivered professional casement window installation across Massachusetts and Rhode Island for over 40 years, with more than 11,000 completed projects behind them. Their team handles every step, from precise measurement and flashing to anchoring, insulating, and finishing, so you get a window that performs correctly from day one.

A professionally installed casement window delivers the compression-seal energy efficiency and full ventilation that the design promises. Bruin Corp of Attleboro backs every installation with quality craftsmanship and financing options that make the project accessible without delay. Contact Bruin Corp of Attleboro for a consultation and get a clear, written quote for your home.
FAQ
What is a casement window installation?
Casement window installation is the process of fitting a side-hinged window into a prepared wall opening using precise measurement, flashing tape, shims, fasteners, and foam insulation to create an airtight, weatherproof, and fully operational window unit.
Can I install a casement window myself?
DIY casement window installation is possible for experienced homeowners, but errors in leveling, anchoring spacing, or foam application can cause air leaks, frame bowing, and voided warranties. Professional installation is recommended for most replacement projects.
How long does casement window installation take?
A single casement window replacement typically takes a professional installer two to four hours, depending on the condition of the rough opening and whether structural repairs are needed.
What tools do I need for casement window installation?
The core tools include a tape measure, level, drill, screwdriver bits, utility knife, caulk gun, low-expansion spray foam, cedar shims, and self-adhesive flashing tape. Custom-ordered windows may require additional tools based on frame material.
How do casement windows compare to double-hung windows for energy efficiency?
Casement windows outperform double-hung windows on energy efficiency because their locking hardware creates a compression seal that pulls the sash tightly against the frame. Double-hung windows use a sliding contact seal, which allows more air infiltration over time.