


Proper preparation is the single biggest factor separating a window upgrade that lasts 30 years from one that leaks within 18 months. When you prepare your home for a window upgrade in Mansfield, MA, you are setting the stage for energy savings, better curb appeal, and a warranty that actually holds up. Massachusetts homeowners who qualify for the Mass Save $75 rebate per window replacement have even more reason to get every step right. Bruin Corp of Attleboro has completed over 11,000 projects across Massachusetts and Rhode Island, and the pattern is consistent: homes that are well prepared before installation day get better results, faster.
How to prepare your home for a window upgrade in mansfield, MA
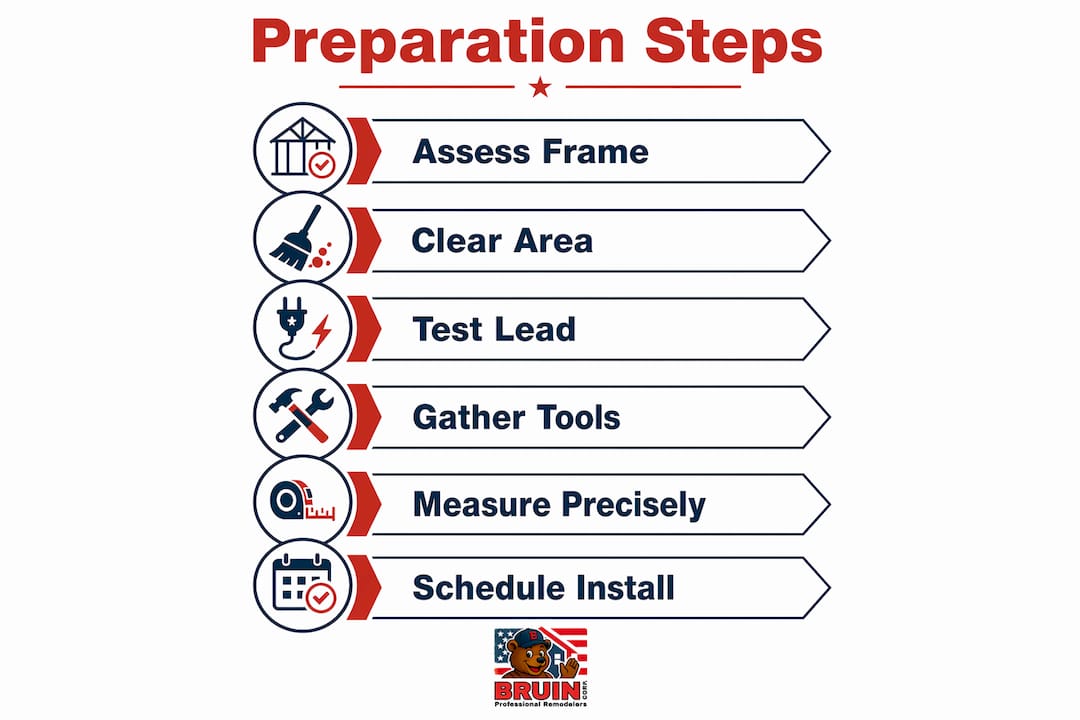
Before any installer arrives, you need the right tools and materials on hand. Showing up unprepared on installation day adds time, cost, and risk to the entire project.
Tools you need on hand:
- Measuring tape (at least 25 feet)
- Carpenter’s square and level
- Caulking gun and low-expansion spray foam
- Utility knife and pry bar
- Non-corrosive pan-head screws
- Shims (cedar or composite)
Materials for water management:
- Self-adhering flashing tape (minimum 4 inches wide)
- Backer rod for larger gaps
- Sill pan flashing with corners turned up
- Silicone or polyurethane sealant
Clearing the work area matters as much as gathering supplies. Move furniture at least 3 feet from each window on the interior. Remove blinds, curtains, and any wall art near the opening. On the exterior, clear shrubs, patio furniture, or anything within 4 feet of the window. Installers need unobstructed access on both sides to work safely and accurately.
Pro Tip: If your home was built before 1978, test for lead paint before any window removal. Massachusetts law requires certified contractors for lead paint disturbance, and skipping this step can create legal and health liability.

Insert or full-frame: how do you measure and assess your windows?
The choice between an insert replacement and a full-frame replacement depends entirely on what your existing frame looks like. Getting this wrong means either paying for unnecessary demolition or installing a new window into a rotted frame that will fail in two years.
How to measure correctly
Accurate window measurement requires taking three readings for both width and height, then using the smallest number.
- Measure width at the top, middle, and bottom of the opening.
- Measure height at the left side, center, and right side.
- Record the smallest measurement for each dimension.
- Measure both diagonals corner to corner. If they differ by more than 1/4 inch, the frame is out of square.
- Check the depth of the frame to confirm your new window will fit the profile.
Out-of-square frames require shimming during installation to bring the window into alignment. Skipping this step causes binding sashes, broken seals, and failed weatherstripping within a few seasons.
Insert vs. full-frame: which one do you need?
| Condition | Recommended Method |
|---|---|
| Frame is square within 1/4 inch, no rot | Insert replacement |
| Frame has rot, mold, or structural damage | Full-frame replacement |
| You want to resize the opening | Full-frame replacement |
| Exterior trim and siding are intact | Insert replacement |
| Water damage visible around frame | Full-frame replacement |
Insert replacement is the right call when the existing frame is structurally sound and square. Full-frame replacement is necessary when rot is present or when you need to resize the opening. Full-frame work involves removing exterior trim and siding down to the rough opening, which adds labor time and cost but produces a cleaner, longer-lasting result.
Pro Tip: Probe the frame corners with a screwdriver. If the wood compresses or crumbles, you have rot. Do not attempt an insert replacement on a rotted frame regardless of how minor the damage looks from the surface.
What are the step-by-step preparation tasks before installation day?
Physical preparation of the opening is where most homeowners either win or lose the installation. Proper water management depends on flashing components applied in a specific sequence, from sill to jambs to head, so that gravity always drains water away from the structure.
- Clean the rough opening. Remove old caulk, debris, and any loose material from the sill, jambs, and head. A clean surface is required for flashing tape to bond correctly.
- Inspect for rot and damage. Replace any deteriorated wood before proceeding. Installing over rot voids most manufacturer warranties.
- Apply sill pan flashing. Lay self-adhering flashing tape across the sill first, with the corners turned up at least 1 inch onto the jambs. This creates a waterproof tray that catches any water that gets past the window.
- Apply jamb flashing. Run flashing tape up each jamb, overlapping the sill flashing by at least 2 inches. This shingle-lap sequence is non-negotiable.
- Dry-fit the window. Set the window in the opening without fastening it. Check for level, plumb, and square. Place shims at the sill corners and at each fastening point along the jambs.
- Back-caulk the flanges. Apply sealant behind the nailing flange on the jambs and head before final placement. Leave the bottom flange unsealed so water can drain freely from the sill pan. Sealing the bottom traps moisture and causes mold.
- Set and fasten the window. Place the window into the opening, confirm level and square again, then fasten using manufacturer-designated holes.
- Apply head flashing. Lap the head flashing over the top of the window flange last. This is the final layer in the water management sequence.
Fastener comparison for nailing flanges:
| Fastener Type | Risk Level | Recommended |
|---|---|---|
| Roofing nails (nail gun) | High: cracks flanges, voids warranty | No |
| Non-corrosive pan-head screws | Low: adjustable, maintains seal | Yes |
| Standard wood screws | Medium: corrosion risk over time | No |
Using pan-head screws in manufacturer-designated holes is the correct method. Nail guns deliver too much force and frequently crack or distort the nailing flange, which creates gaps that let water in and voids the warranty.
What mistakes ruin a window upgrade before it starts?
Most window failures trace back to preparation errors, not product defects. Knowing what to avoid saves you from a callback, a warranty dispute, or a mold problem two winters from now.
Common preparation mistakes:
- Sealing the bottom flange. This blocks the drainage path and traps water in the sill pan. Water with nowhere to go finds its way into the wall cavity.
- Skipping the shingle-lap flashing sequence. Applying head flashing before jamb flashing, or jamb flashing before sill flashing, defeats the entire water management system.
- Over-fastening with a nail gun. Excessive nailing pressure damages the window flange, a common installer mistake that invalidates warranties and invites moisture damage.
- Ignoring manufacturer fastener spacing. Most manufacturers specify fastener placement and spacing in their installation instructions. Deviating from those specs voids the warranty.
- Installing over a dirty or wet surface. Flashing tape will not bond to dusty, wet, or painted surfaces. Clean and dry the opening before applying any tape.
“Successful window upgrades depend more on proper water management and flashing sequence than on brand choice.” — Fine Homebuilding
If you discover a preparation error after installation, act immediately. A bottom flange that was accidentally sealed can be carefully cut open with a utility knife. Improperly applied flashing tape must be removed and reapplied. Catching these issues before the interior trim goes back on is far less expensive than addressing water damage after the fact. Read through the window installation best practices guide from Bruin Corp of Attleboro for a detailed checklist you can use before and after installation.
How do you coordinate with professional installers in mansfield, MA?
Good preparation only pays off when your installer knows what you have already done. Communication before installation day prevents duplicated work, missed steps, and warranty gaps.
Questions to ask your installer before they start:
- What flashing system do you use, and does it follow a shingle-lap sequence?
- What fastener type and spacing do you use for nailing flanges?
- Are you familiar with Mansfield building permit requirements for window replacement?
- Will you handle the Mass Save documentation for the $75 per window rebate?
- How do you handle the head flashing if I have existing exterior casing?
Mansfield, MA falls under Massachusetts State Building Code, which requires permits for most window replacements that involve structural changes or full-frame removal. Confirm with your installer whether a permit is required for your specific project. Pulling a permit protects you at resale and confirms the work meets code.
Schedule installation during a dry weather window. Wet conditions compromise flashing tape adhesion and make exterior work unsafe. A two-day dry forecast before and after installation is a reasonable minimum. If you are replacing windows before winter, review the seasonal preparation tips from Bruin Corp of Attleboro to make sure your home is ready for cold-weather installation conditions. Energy-efficient windows using vinyl or composite frames with double or triple-pane insulated glass qualify for Mass Save rebates and perform well in Massachusetts winters.
Bruin corp of attleboro helps mansfield homeowners upgrade with confidence
Bruin Corp of Attleboro brings over 40 years of experience and more than 11,000 completed projects to every Mansfield window replacement. Their team handles the full scope of preparation, flashing, fastening, and finishing so your new windows perform exactly as the manufacturer intended.

Whether you are replacing a single drafty double-hung or upgrading every window in the house, Bruin Corp of Attleboro offers free estimates and flexible financing options to fit your budget. Their installations are designed to qualify for Mass Save rebates, so you capture every dollar of available incentive. Visit Bruin Corp of Attleboro to schedule your free estimate and get your Mansfield home ready for a window upgrade that lasts.
Key takeaways
A properly prepared window opening, with correct flashing sequence, appropriate fasteners, and a clear drainage path, is what determines whether your Mansfield window upgrade lasts decades or fails within a few seasons.
| Point | Details |
|---|---|
| Flashing sequence is non-negotiable | Apply sill, then jamb, then head flashing in shingle-lap order to manage water correctly. |
| Leave the bottom flange open | Never seal the bottom flange; it must stay open to drain water from the sill pan. |
| Use screws, not nail guns | Pan-head screws in manufacturer holes prevent flange damage and keep warranties intact. |
| Measure three points per dimension | Take width and height at three locations each and use the smallest number for a proper fit. |
| Mass Save rebates reward preparation | Qualifying energy-efficient windows earn $75 per unit in Massachusetts, making preparation financially worthwhile. |
FAQ
What tools do i need to prepare for a window replacement?
You need a measuring tape, carpenter’s square, caulking gun, shims, flashing tape, low-expansion foam, and non-corrosive pan-head screws. Having these ready before your installer arrives keeps the project on schedule.
How do i know if i need insert or full-frame replacement?
If your existing frame is square within 1/4 inch and shows no rot, insert replacement is appropriate. Rotted, damaged, or out-of-square frames require full-frame replacement down to the rough opening.
Why should i leave the bottom window flange unsealed?
The bottom flange must stay open to allow water to drain from the sill pan. Sealing it traps moisture inside the wall cavity, which leads to mold and structural rot over time.
Does mansfield, MA require a permit for window replacement?
Most full-frame window replacements in Mansfield require a building permit under Massachusetts State Building Code. Confirm with your installer before work begins to protect your investment at resale.
What rebates are available for window upgrades in massachusetts?
The Mass Save program offers $75 per qualifying window replacement for Massachusetts homeowners in 2026. Windows must meet energy-efficiency standards, typically double or triple-pane with vinyl or composite frames.